
This post is about bringing up the μController based display module for the Clock. In a previous post, I outlined the approach that I would be taking. Since this will be my first attempt at in-board programming on a “real” project, the idea is to take a systematic approach to try to quickly resolve any issues that might arise.
Setting up the Environment

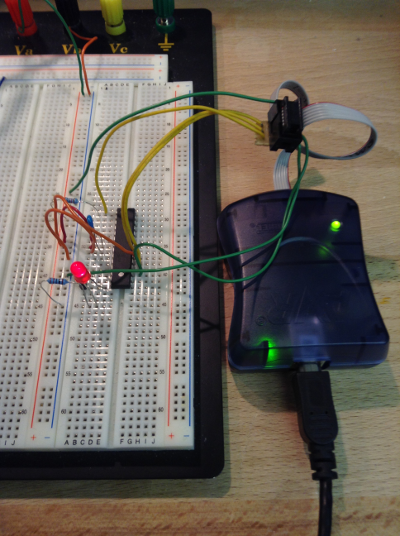
To date, I have been working in the safe, insular world of myAVR and BASCOM on a newly configured PC. I have been lucky in that everything has “simply worked”. In order to start programming directly onto a project’s board, I need to start using the AVRISP mkII. Like I outlined in the previous post, the idea is to bread-board a controller with a LED. Using a simple “Blinker” program, I can ensure that the communication from PC to ISP to μController is correct without having to involve any issues that might be present on the display module board.

As it turned out, this exercise was worth while. In order to communicate with the AVRISP mkII, I needed the appropriate drivers. This are installed with when installing the AVR Studio. This is a C/C++ IDE. My objective, at this stage is to stick with BASCOM. I will move to C at some later stage. In order to use the BASCOM-AVR IDE, I had to install the USB_LIB and set up a device filter, as per the BASCOM help document.
With the drivers installed correctly, I was able to see the AVRISP mkII display the correct status on its LEDs and I could then start programming the minimal “bread-boarded” μController.
$Regfile="m8def.dat"
$Crystal=4000000
$hwstack=40
$swstack=40
$framesize=60

' $baud = 4800
Config Portb = Output

Portb.0 = 1

Do
   Set Portb.0
   Waitms 1000
   Reset Portb.0
Loop
End
Next Step
The next steps will be to bring the board up slowly. That is to apply power and check that power is where it is intended to be. Once that checks out, the same test program used to verify the environment will be used to ensure that the board can actually be programmed. The test program will be the same “blink” example.
